Detailed Clash Verge Tutorial for macOS
1. APP Download and Installation
Download Clash Verge
Click here to go to the macOS download page
- Download from the navigation bar on our website
- Or find the download link on the relevant website
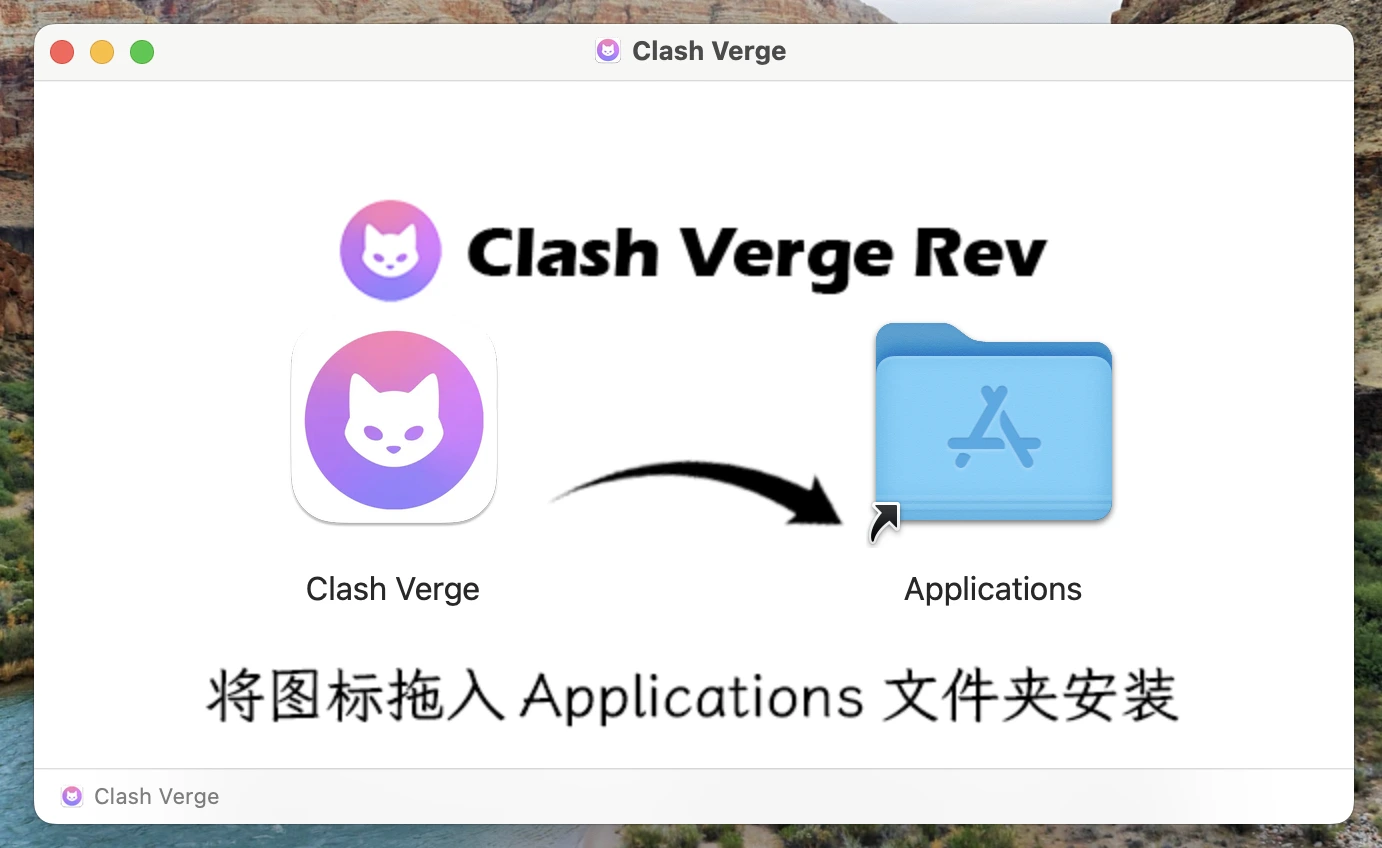
Install Clash Verge
- Double-click the downloaded dmg file
- Follow the prompt to drag it to the Applications folder
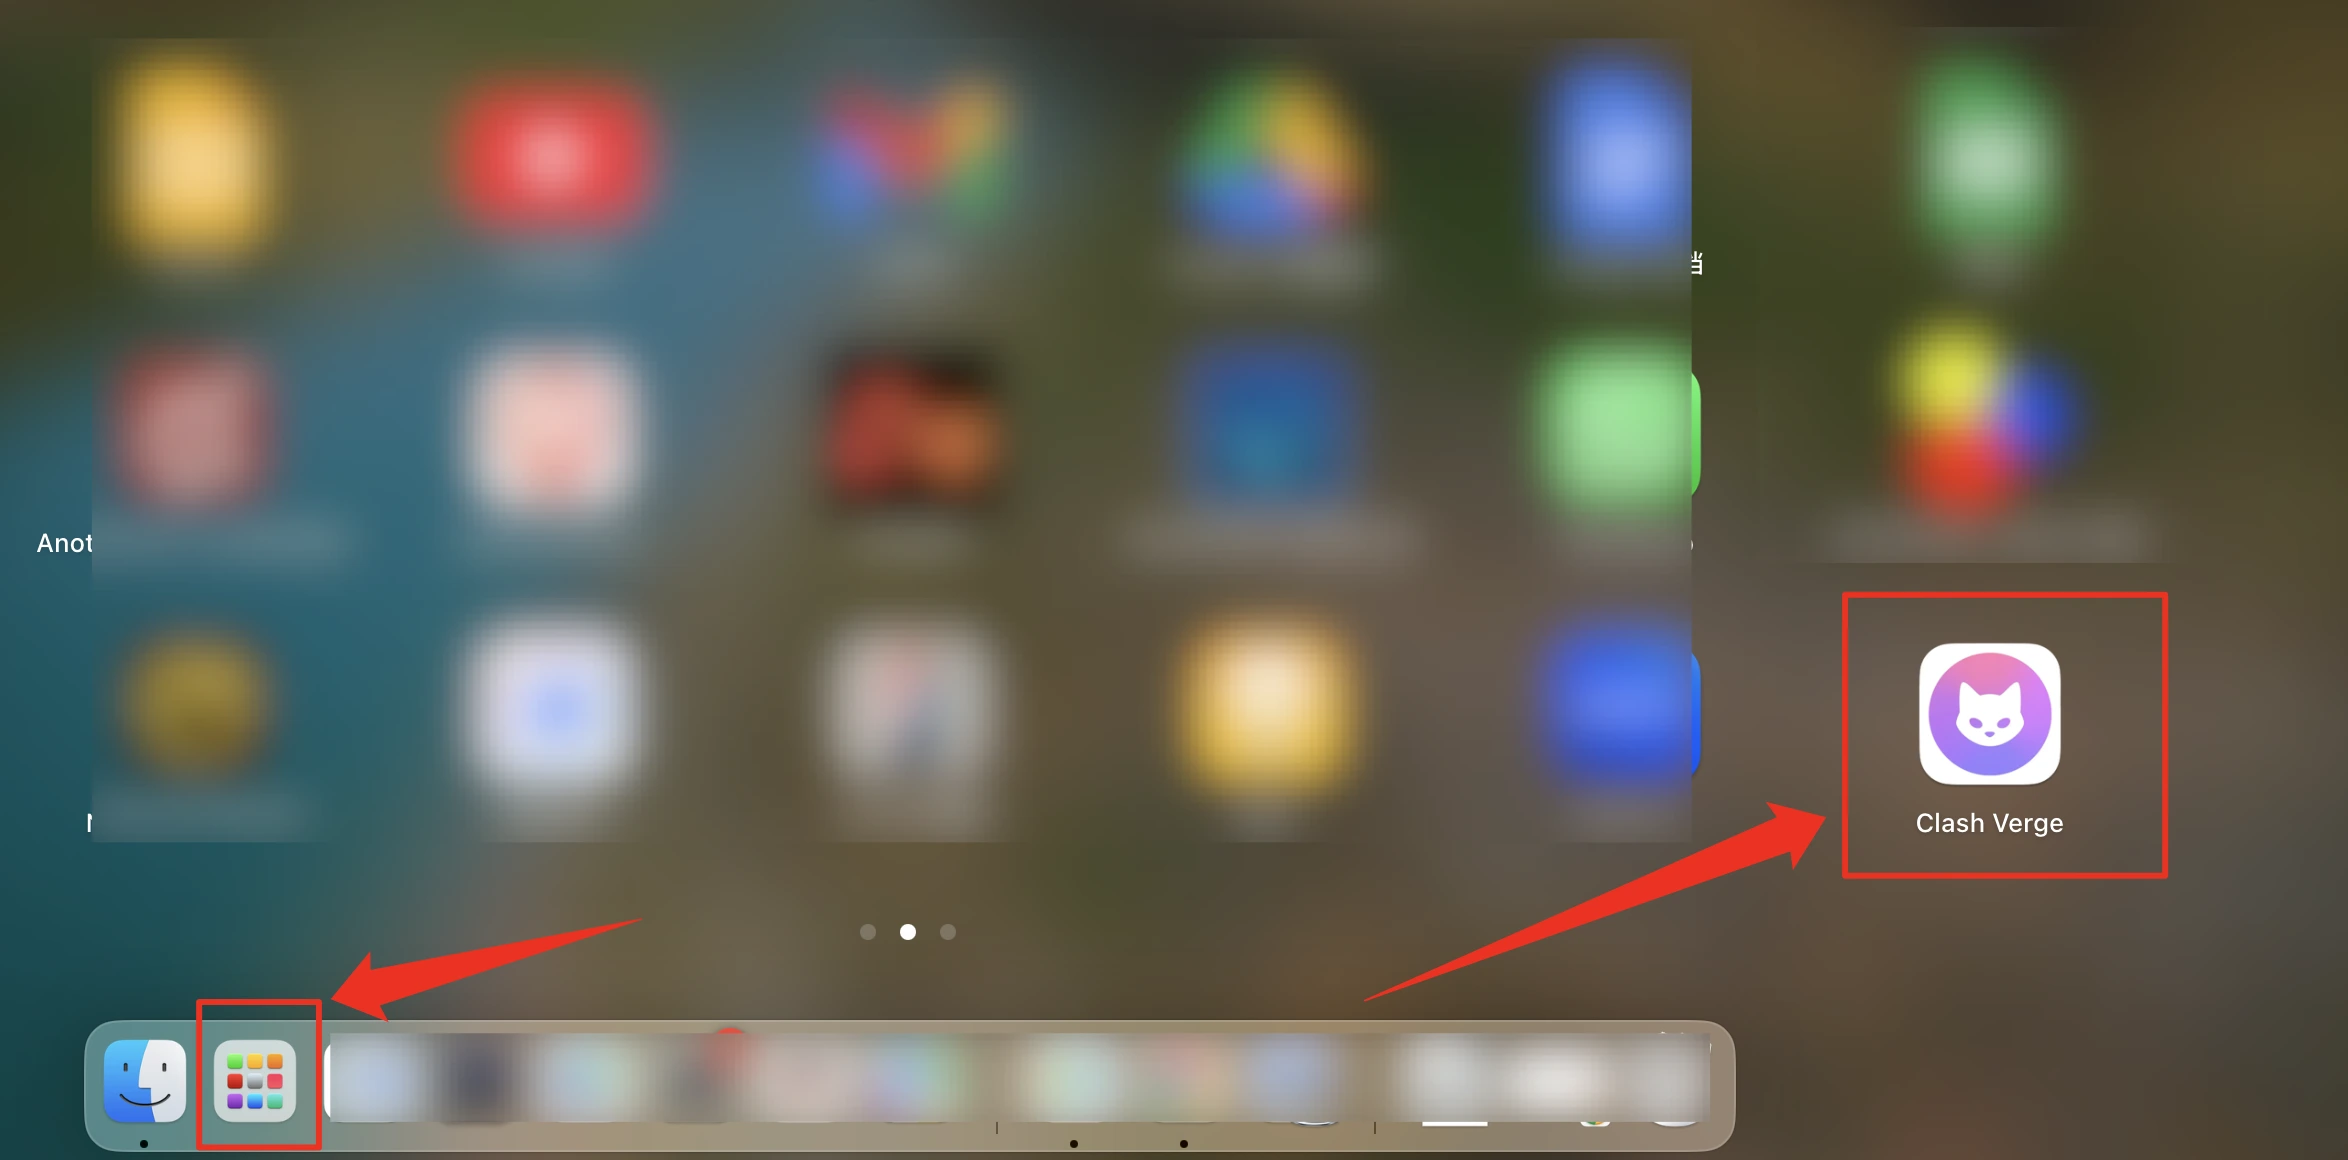
- After installation, open the app from Launchpad
- If prompted as non-AppStore, click "Open"

2. Import Subscription and Usage
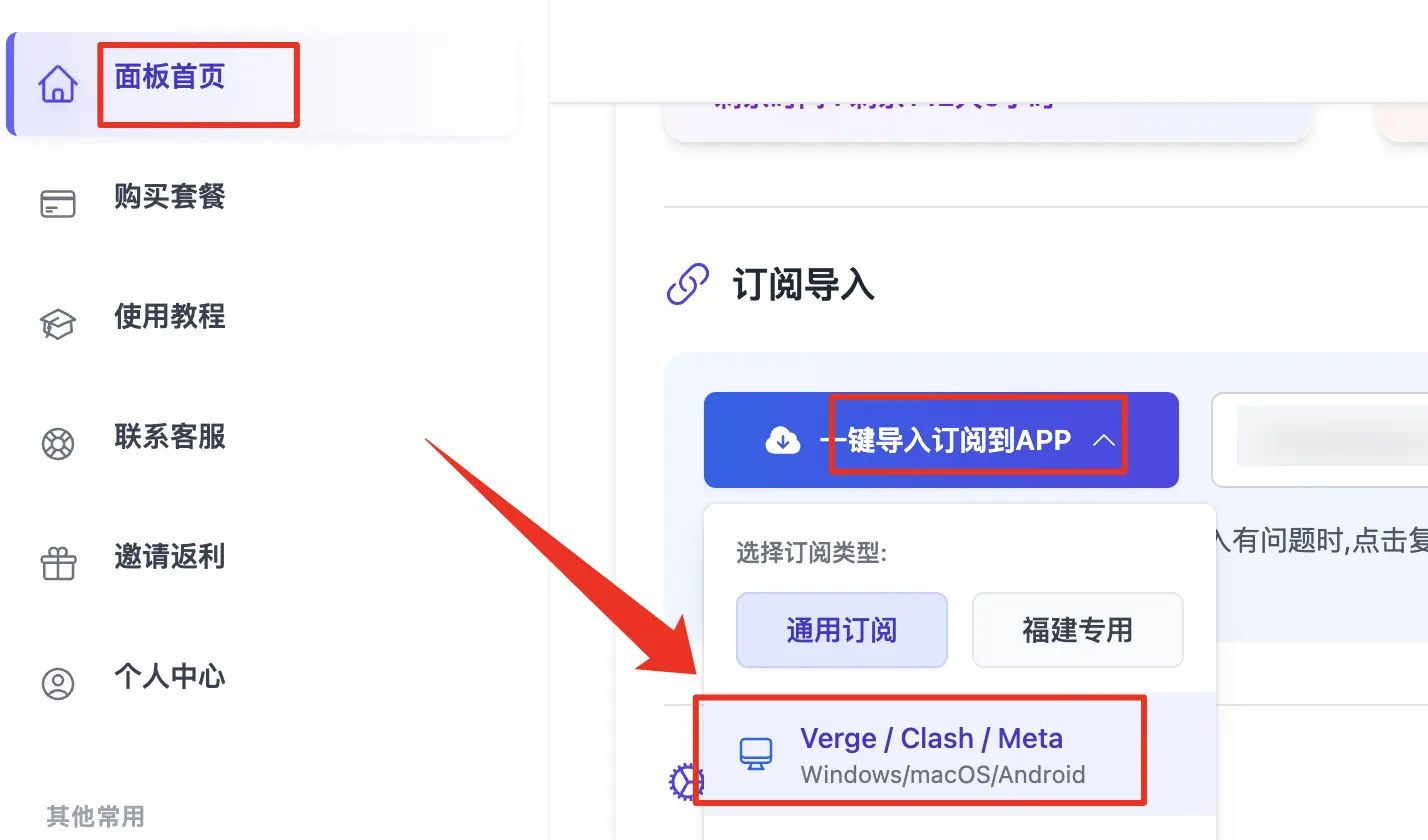
Import Subscription from Website and Select Subscription File
- On the homepage, click "One-click Import", select the Clash/Verge button, and click Import
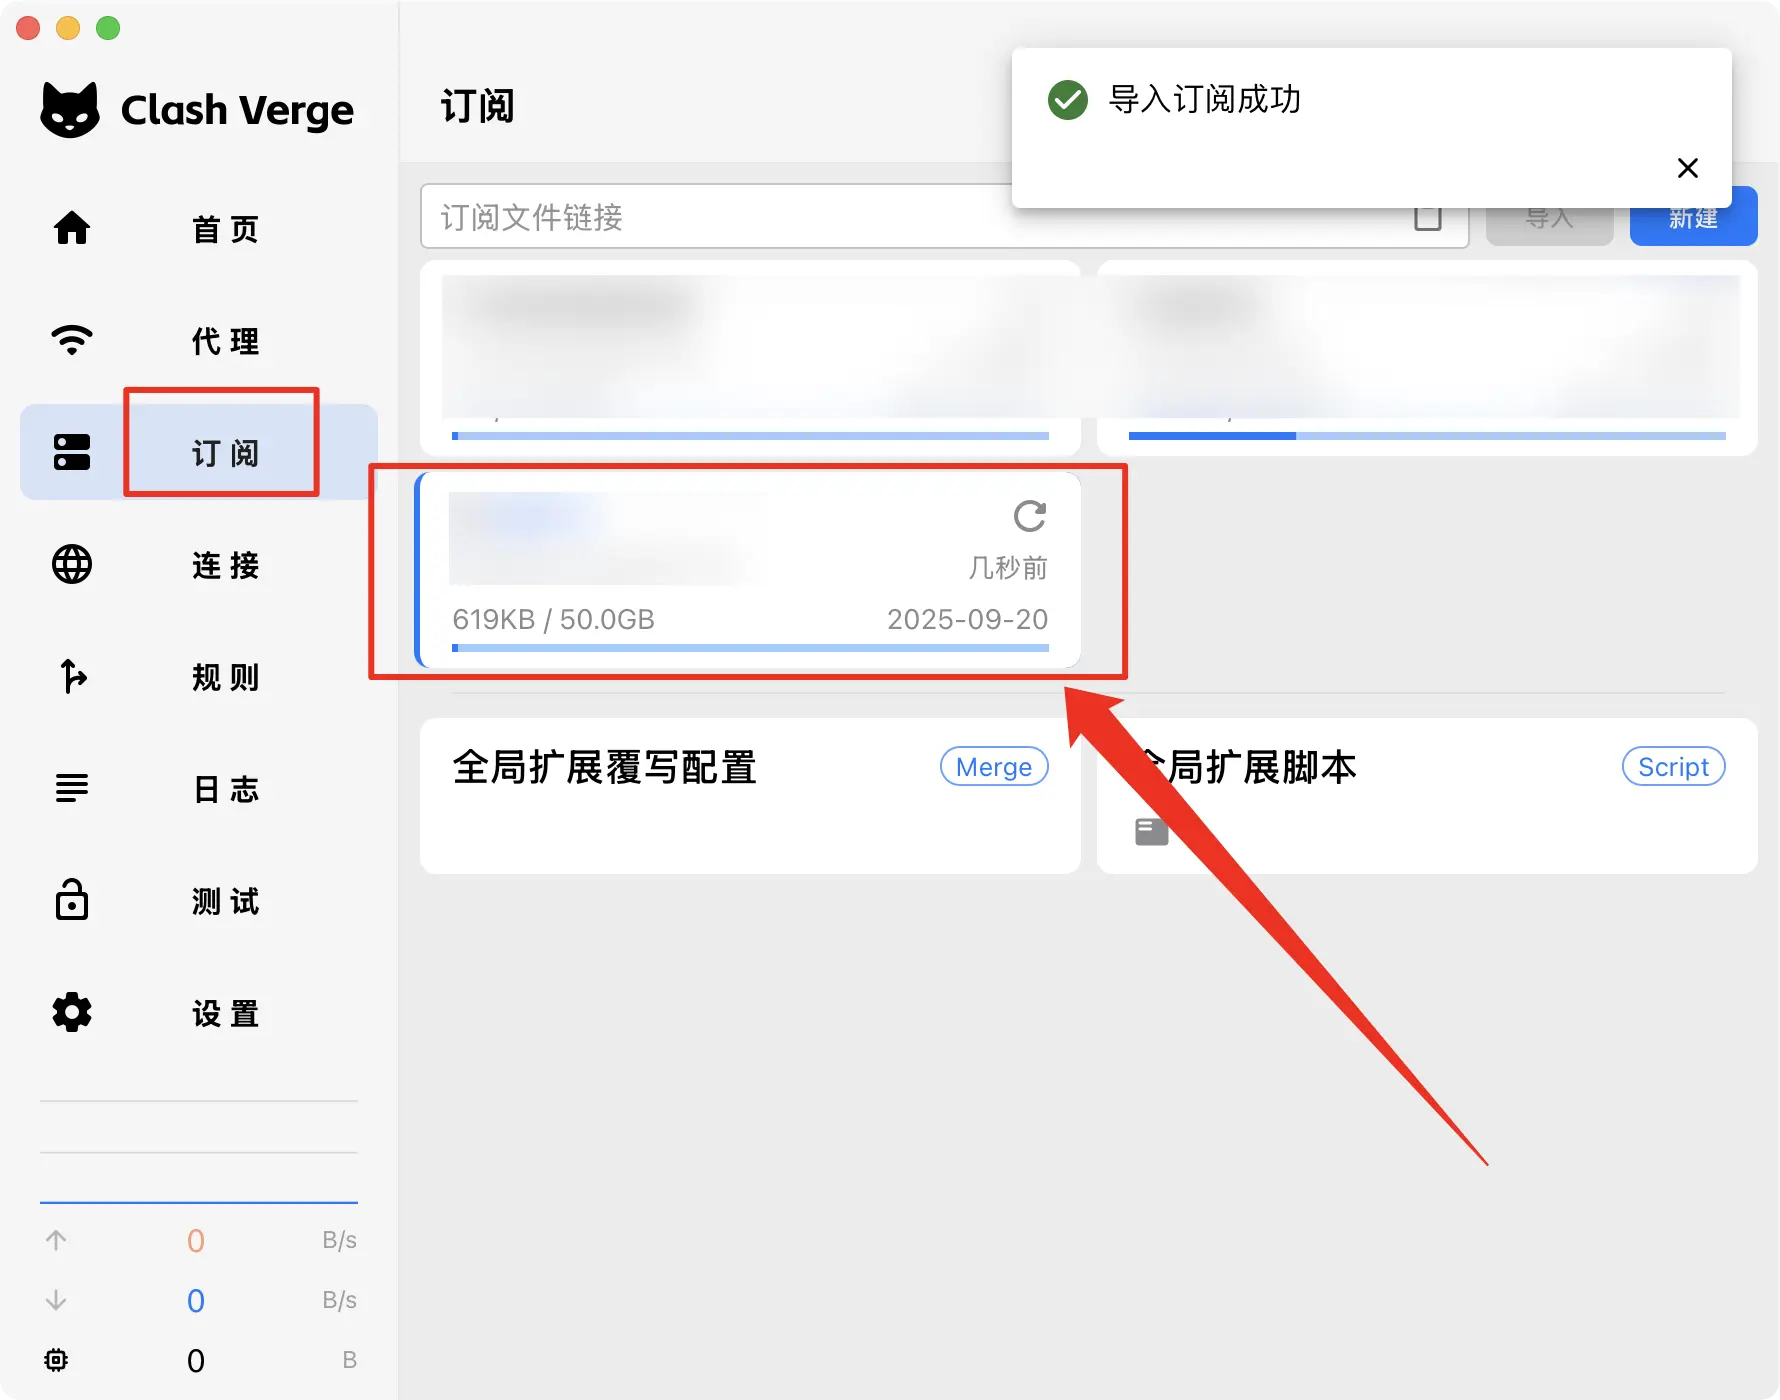
- In Clash Verge, click the "Subscription" option on the left, and click the name on the right to select the subscription
Select Node and Mode, Turn on Proxy Switch
- In Clash Verge, click the "Proxy" option on the left, select the node you want to use (do not choose auto, manually select a region)
- Select "Rule" as the proxy mode at the top right
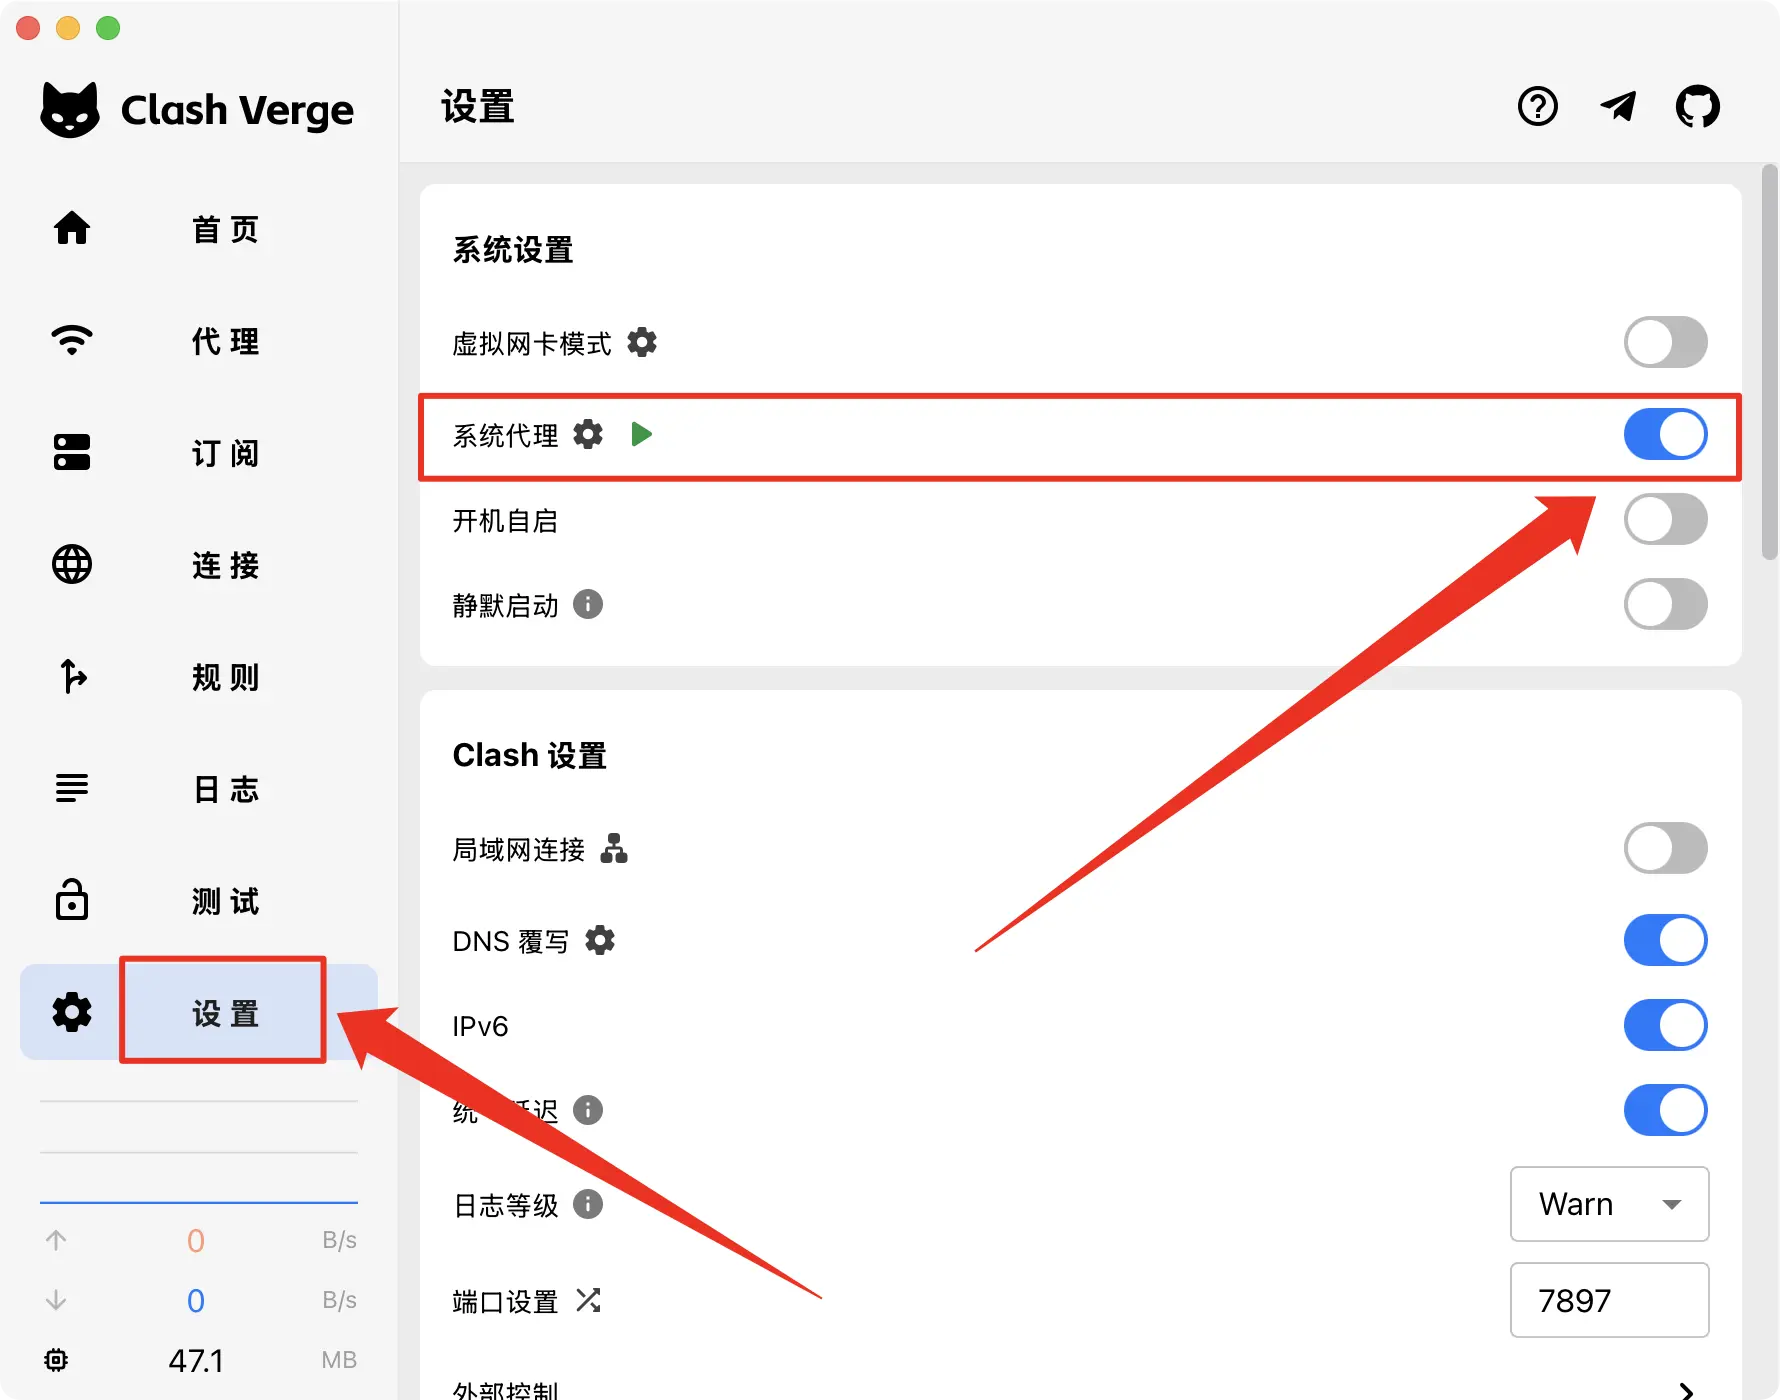
- Click the "Settings" option on the left, click "Set as System Proxy", and turn on the main switch of the APP!

Test Node Availability in Browser
- Open Chrome browser
- Enter youtube.com to see if it can be opened.

3. Common Issues and Solutions
System Proxy Settings
- Proxy mode selection:
- Global Mode: All traffic goes through proxy, not recommended, may cause issues!!!
- Rule Mode: Traffic routing based on rules, strongly recommended!!!
- Direct Mode: No proxy
Connection Issues
- Check if subscription has expired
- Check if traffic is below 0
- Check if proxy switch is turned on
- For Chrome, check if there are conflicting extensions like Google Assistant, Omega, XXX proxy, etc.
- For Firefox, check if it's using system proxy
Basic Settings
First Launch
- Open Clash Verge.app
- Find the Clash Verge icon in the menu bar
- Click the icon and select "Preferences"
Import Configuration
- Click on the "Profiles" tab on the left
- Click the "+" button to add a configuration
- Enter the subscription link
- Click "OK" to save
System Proxy Settings
- Select "System Proxy" in the preferences
- Choose a proxy mode:
- Global Mode: All traffic goes through the proxy
- Rule Mode: Traffic is routed according to rules
- Direct Mode: No proxy is used
Advanced Features
Rule Settings
- Edit rules in the configuration page
- Add custom rules:
DOMAIN-SUFFIX,google.com,Proxy
DOMAIN-KEYWORD,facebook,Proxy
IP-CIDR,192.168.1.0/24,DIRECT
Policy Group Configuration
- Create policy groups
- Set up load balancing
- Configure fallback options
- Set up automatic speed testing
Port Settings
- Modify HTTP port
- Modify SOCKS port
- Set port range
- Configure port forwarding
Common Issues and Solutions
Connection Problems
- Check if proxy nodes are available
- Confirm system proxy settings
- Check logs for troubleshooting
Performance Optimization
- Adjust memory usage
- Optimize rule matching
- Configure DNS settings
Security Settings
- Set access password
- Configure IP whitelist
- Enable TLS encryption